This is part TWO of a series of tutorials on Server 2012 Remote Desktop Services.
HOW TO CREATE & INSTALL A CERTIFICATE FOR YOUR RDS RDWEB SITE ON SERVER 2012
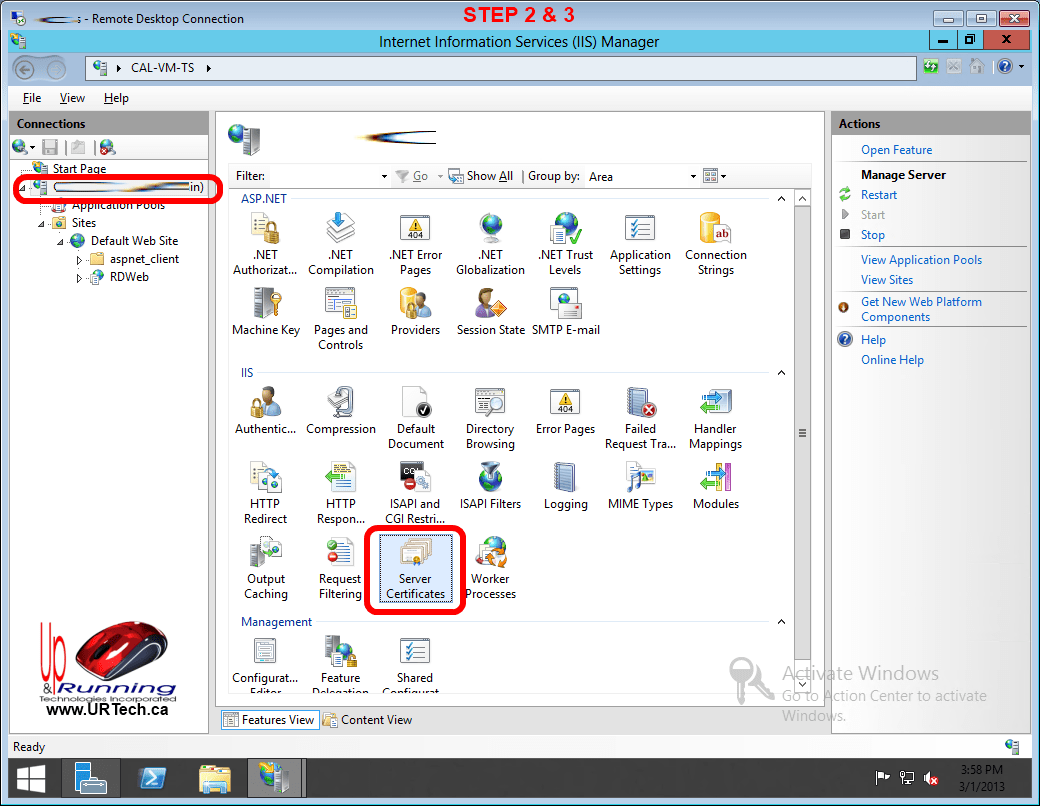
- Start IIS MANAGER
- Click on your servers host name
- Click SERVER CERTIFICATES
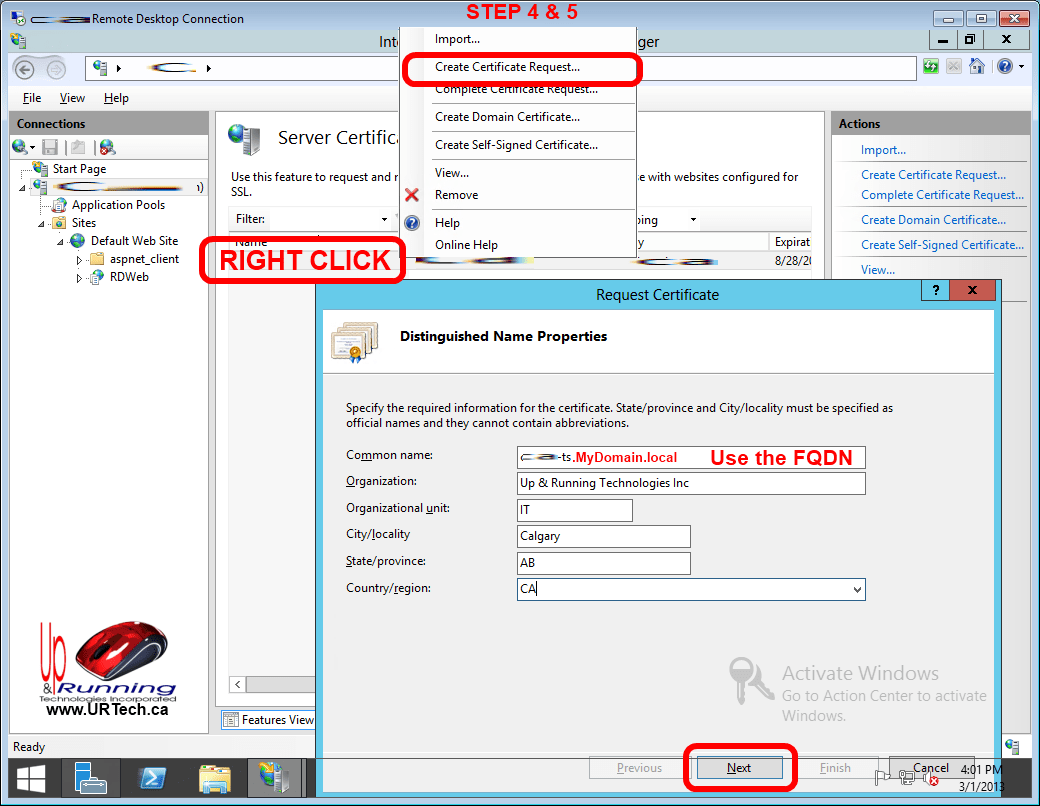
- Right click and select CREATE CERTIFICATE REQUEST
- Enter all of the required info and click NEXT. Be sure to enter a FULLY quanlified domain name
- Set the level to 2048
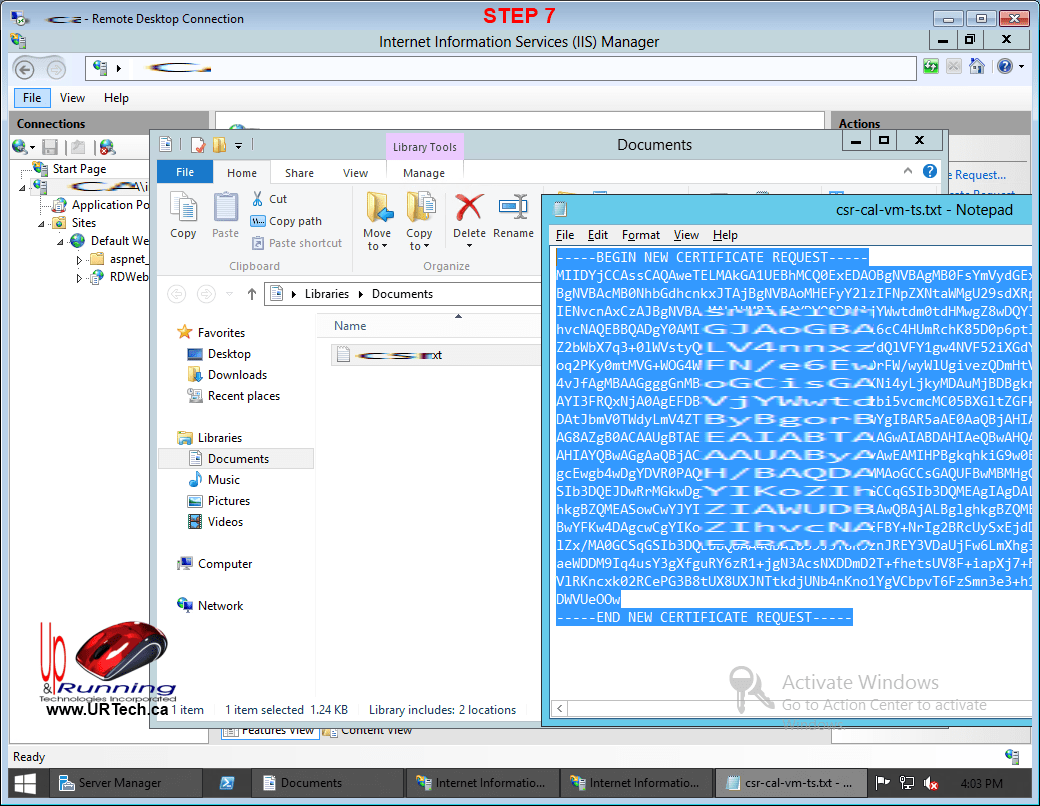
- Open your Certificate Request, copy the contents to your providers form (in my case GoDaddy) and wait for the certificate.
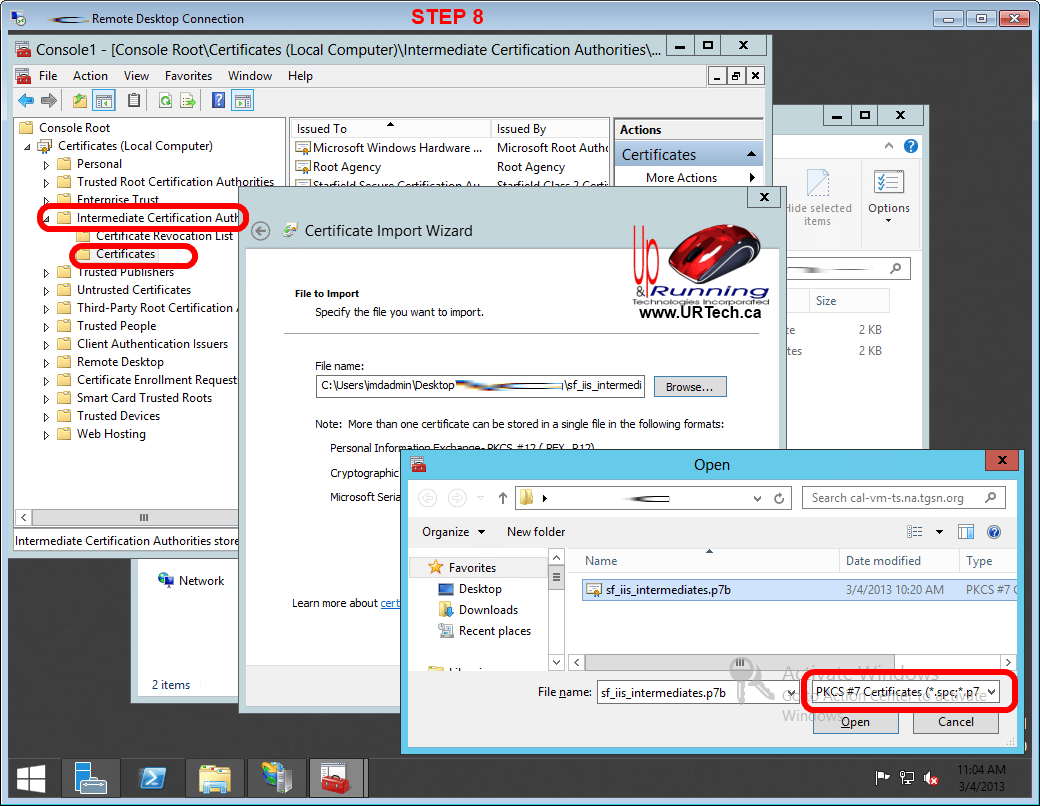
- OPTIONAL: In my case I bought a $20/year cert from GoDaddy which required me to add an “intermediate cert” which I did following GoDaddy’s instructions http://help.securepaynet.net/article/4801 – If you don’t have any intermediate certs (i.e. you paid $50/years, then you can skip this step)
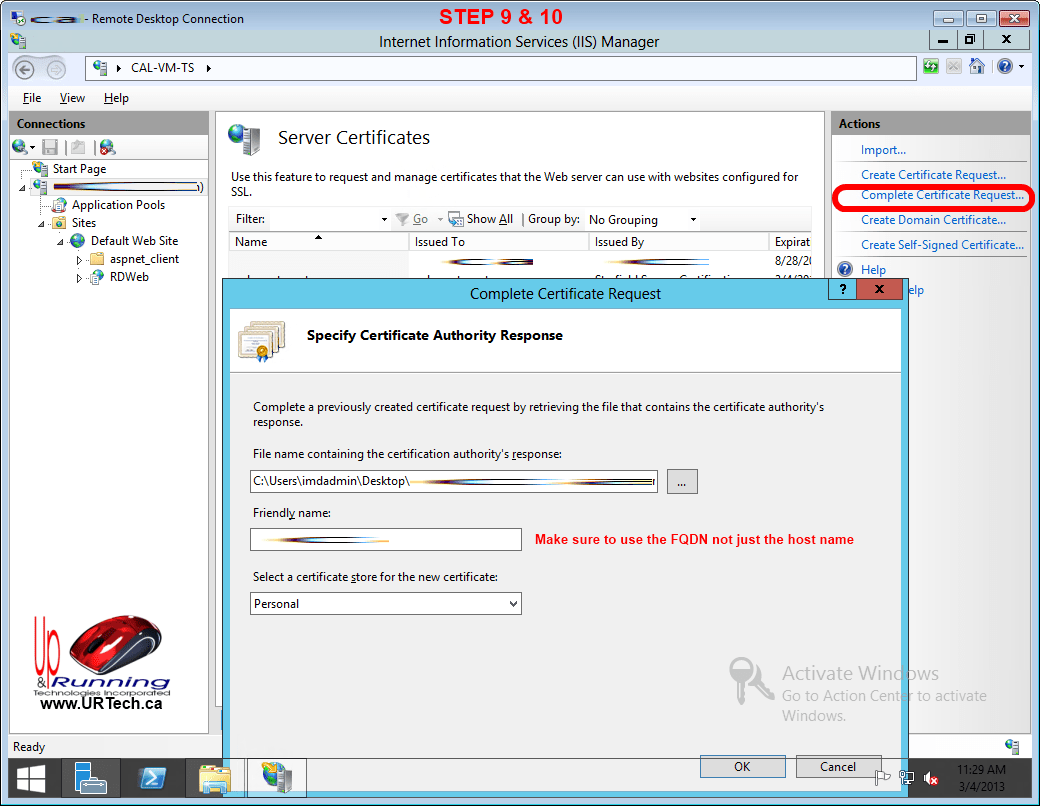
- In IIS click on your servers Host Name and then COMPLETE CERTIFICATE REQUEST from the Actions menu (right side)
- Browse to the cert, set the friendly name to be the FQDN name (i.e. MyHost.MyDomain.Org), then click OK
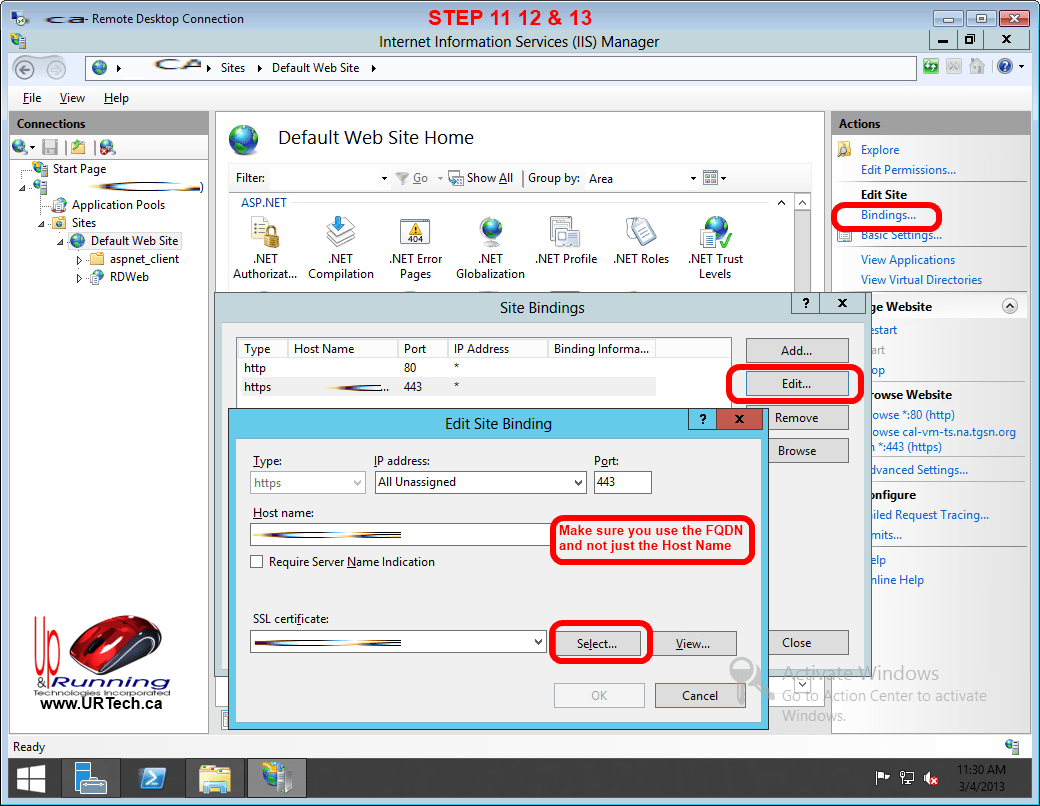
- In IIS, click on the DEFAULT WEB SITE, then BINDINGS (from the Actions menu on the right)
- Double click the PORT 443 entry and in the HOST NAME enter the FQDN name (i.e. MyHost.MyDomain.Org)
- Click SELECT button, find your cert, and click OK (note you may have to changed the FILE TYPE drop down to *.* to see your .CER or CERT file)
- OPTIONAL: In my case I restart IIS using IISRESET in an elevated CMD window but I don’t think it was required
Now when you surf to your FQDN name \RDWeb (i.e. https://MyHost.MyDomain.Org/RDWeb ) , all of the red certificate warning will be gone.

0 Comments