Everyone in I.T. is abuzz about converting Physical Servers to Virtual Servers and if you are reading this you already know why; decreased costs, reduced licensing, reduced electrical, reduced cooling… New VM servers are easy to create using Microsoft Hyper V under Server 2008 (r2 and newer). The question is: is there an easy way to convert a existing physical server to a virtual one? The answer is very definitely, YES. Below are three easy ways:
Before you do any P2V conversion you really need to:
- Disable or uninstall ANY AntiVirus products
- Disable or uninstall any backup agents (like Symantec Backup Exec Agent)
- Disable or uninstall any non-Microsoft firewalls
- Disable or uninstall any other non-required software, utilities or user files
- Delete ALL temp files (C:\WINDOWS\TEMP, C:\USERS\<user>\APPDATA\LOCAL\TEMP and your Internet Temp files)
- Empty your Recycle Bin
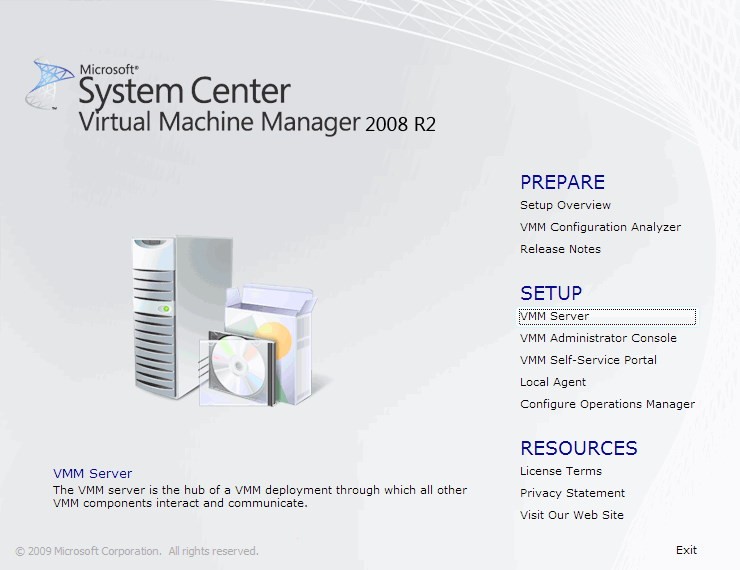
METHOD 1 – SCVMM PHYSICAL TO VIRTUAL TOOL
System Center Virtual Machine Manager, can be downloaded HERE for free and will be fully functional for 180 days! And yes, after 180 days your VM’s will still function, just SCVMM will not. To do a P2V conversion, you likely only need a few hours. It is fast to install incredibly easy to understand and use without training.
Here is my process:
- Install Server 2008 (or R2) on a server which has enough disk space to perform the migration you are thinking of.
- Join that server to the domain
- Install HyperV on that Server
- Install SCVMM SERVER (and let SCVMM install a standalone SQL2005 Express on that server if you wish)
- Install the SCVMM ADIMINSTRATOR CONSOLE
- Run Windows Update, patch the Hell out of it and reboot when prompted
- After the install and updates are complete, launch the SCVMM shortcut and perform the only required configuration step, which is to click ADD HOST from the Action Pane (on the right side of the screen)
- Answer the obvious questions from the ADD HOST wizard
- Click PHYSICAL TO VIRTUAL link from the Action Pane (on the right side of the screen)
- Answer the obvious questions in the wizard with these notes:
- let it create the virtual machine and set the location of the VHD’s as you see fit
- leave the default, DO NOT START THIS SERVER…
- make sure you are
- let it create DYNAMICALLY EXPANDING disks
- you can easily convert them to FIXED DISKS later if you want using EDIT DISK in Hyper-V
- Dynamic will be created much faster than Fixed disks, because it will only copy the area of your source servers hard disk which is consumed by files. It will skip the blank space
- let SCVMM create virtual IDE disks (VHD’s) and not SCSI VHD’s – Read THIS if you are confused.

- During the Conversion, you can watch the P2V process in SCVMM, and you can see what is happening using the Hyper-V Console.�
- After the VHD’s are created you can see it boot several times in HyperV and if you look closely you will see SCVMM install several items including the Virtual Machine Additions through Hyper V server.
- It’s pretty cool to watch and will reduce some of the anxiety of seeing little to no change in the SCVMM console.
- Note that even in Hyper-V there are times when very little will happen for extended (i.e. 10-15 minute) periods… just keep waiting.
- After the P2V conversion is done (yes, this will likely take several hours), boot up the VM
- If you have ANY troubles with the boot up, just keep waiting. I had one that took an hour to boot its first time because SCVMM failed (for some unknown reason) to install the VM Additions.
- If you have any troubles with the Operating System, click TOOLS, INSERT VIRTUAL MACHINE ADDITIONS, re-install the VM ADDITONS and reboot again.
- On the new VM or Azure Virtual Desktop Server run Windows Update and install all updates
- If you want you can now uninstall SCVMM (and SQL Express if you want), but why not leave it in place; you still have 179 days left to use it and it might come in handy.
- Have a nice day

METHOD 2 – DISK2VHD – P2V CONVERSION TOOL
Microsoft’s “Sysinternals” boys have made a very easy to use tool which does the same conversion as SCVMM without all the options and without a 180 trial. Click HERE for more information, download and screen shots.
METHOD 3 – BACKUP & RESTORE:
Yes, this will work:
- Create a new VM in Server 2008 (or r2 or newer) and install the same operating system as you are trying to virtualize.�
- For example, if you have a Windows 2003 Server you want to P2V, install Server 2003 in the new VM.
- Run Windows Update on BOTH the new VM and your old physical server, and patch everything!
- Run Windows Backup on the physical server and have the backup files go somewhere on the network or an external disk
- Once the backup is complete, Restore it on the VM.
- After the restore is complete, reboot the VM to allow it to Plug and Played (PnP) what it thinks it needs
- Install the Virtual Machine ADDITONS.
- Run Windows Update and accept all updates.
- And BINGO was his name-o… you are done.


0 Comments