If you are like me and just inserted a new NIC into your Dell PowerEdge server and found that the boot order had been changed, fear not! You do not have to physically go back into that cooooold server room, 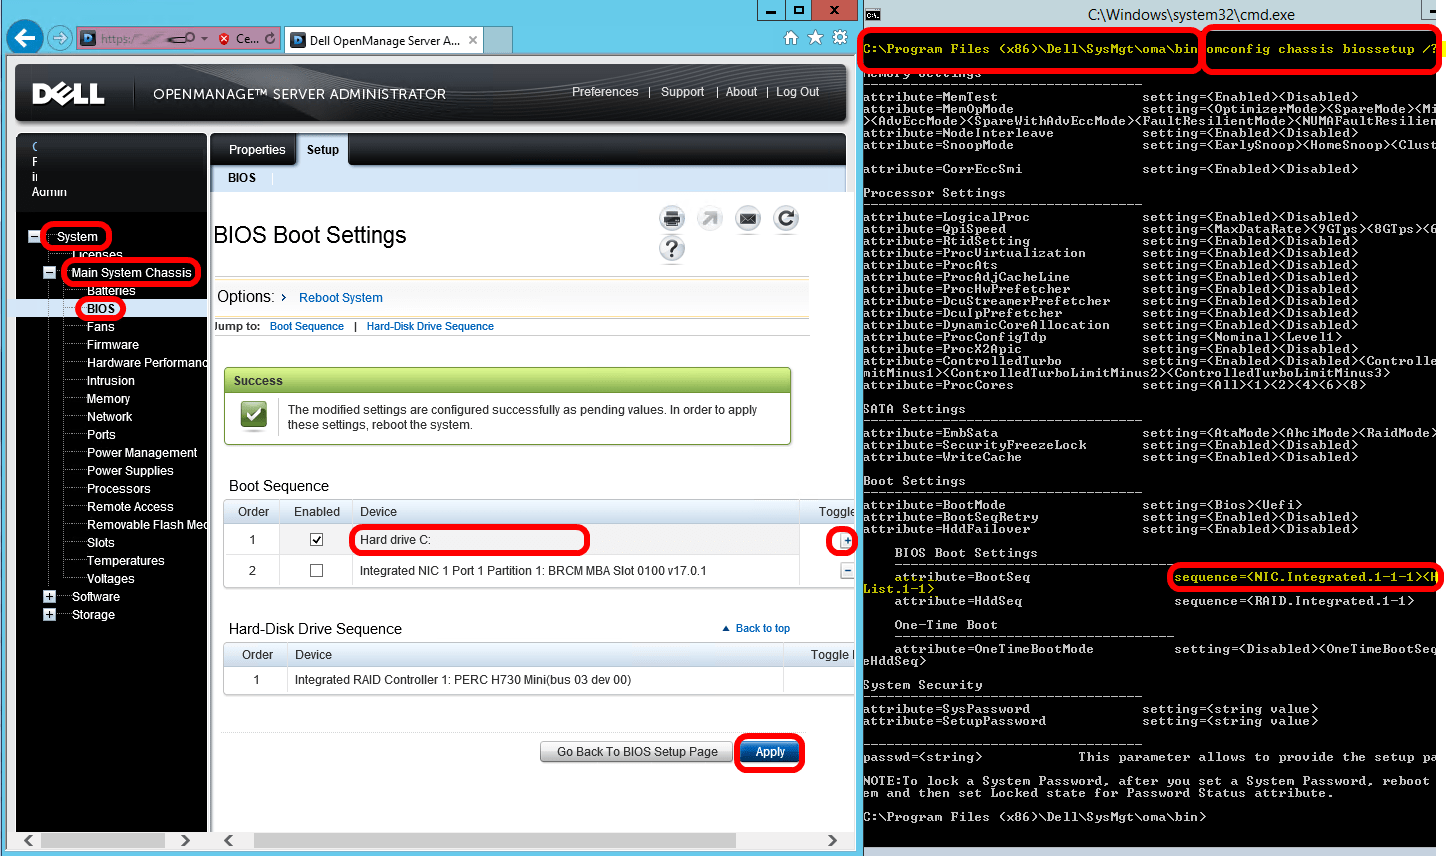 reboot, wait for the server to cycle, futz in BIOS, then reboot again. No, instead you can use Dell’s OpenManage Server Administrator either command line or GUI.
CHANGE BOOT ORDER:
- If you don’t have it already, download and install OpenManager Server Administrator directly from Dell (Try the 32Bit version even on 64bit Windows)
- Expand SYSTEM > MAIN SYSTEM CHASSIS > BIOS > SETUP (tab at top)
- It will take MORE than 5 seconds to update your screen with BIOS settings, so just wait after you click BIOS
- Click on one of the boot options in the BOOT SQUENCE table, like HARD DRIVE C:
- This is the place most people have problems with. You can not perform step 4 until you have clicked on one of the boot options
- Click the + or – (at the end of the BOOT SQUENCE table)
- Click APPLY
Alternately you could use the command line:
- Open a CMD as an ADMINISTRATOR
- CD into C:\Program Files (x86)\Dell\SysMgt\oma\bin
- Type omconfig chassis biossetup /?
- This will provide the help file for SEQUENCE
- Enjoy typing the exact name of the boot options… getting the name wrong would be bad
ENABLE INTEL VIRTUALIZATION TECHNOLOGY:
I found a good article HERE on how to use the Command Line OpenManage Server Administrator to enable Virtualization in the BIOS. The key path is:
- Open a CMD as an ADMINISTRATOR
- CD into C:\Program Files (x86)\Dell\SysMgt\oma\bin
- Type omconfig.exe chassis biossetup attribute=cpuvt setting=enabled”


0 Comments