If you are trying to tighten up your security by adding Virtualization-Based Security (aka VBS) to your Windows 11 you might find this error:
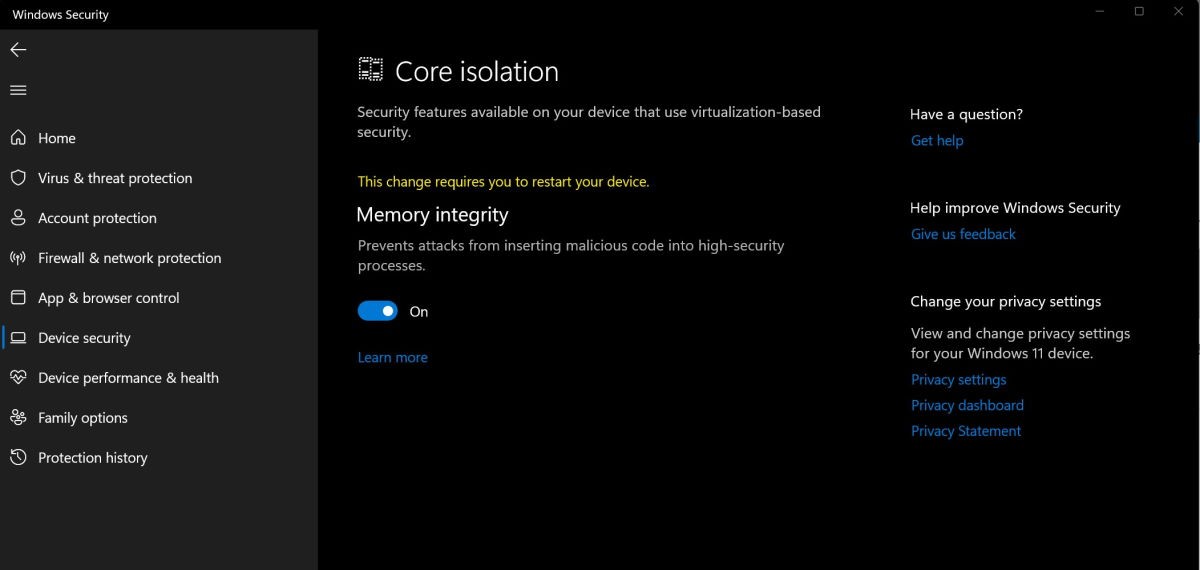
Core Isolation Memory Integrity
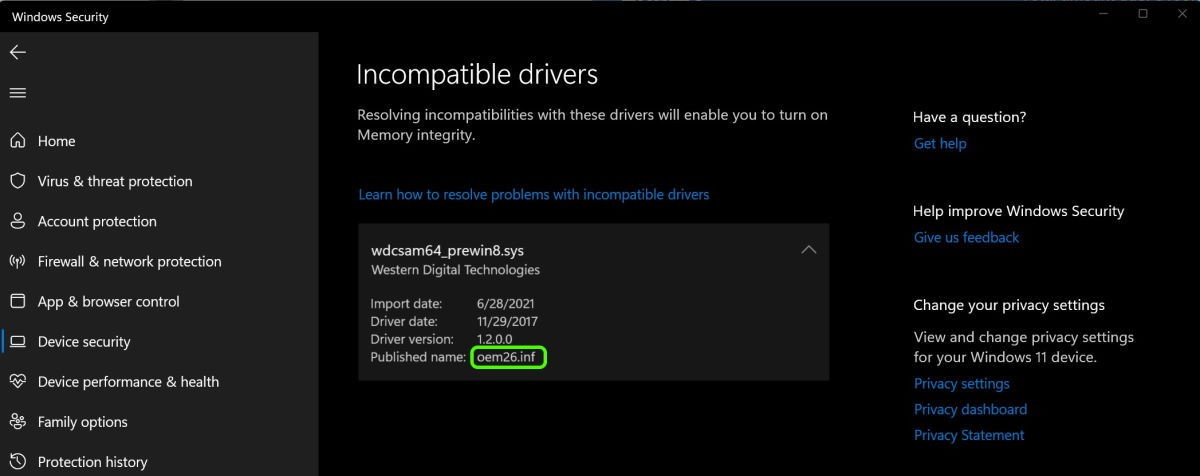
Incompatible Drivers WDCSAM64_PREWIN8.SYS
Driver date: 11/29/2017Driver version: 1.2.0.0Published name: oem26.inf
This is an old driver that ships with both Windows 10 and Windows 11 and very few people need it. In fact we have never run into a situation of any machine using WDCSAM64_PREWIN8.SYS .
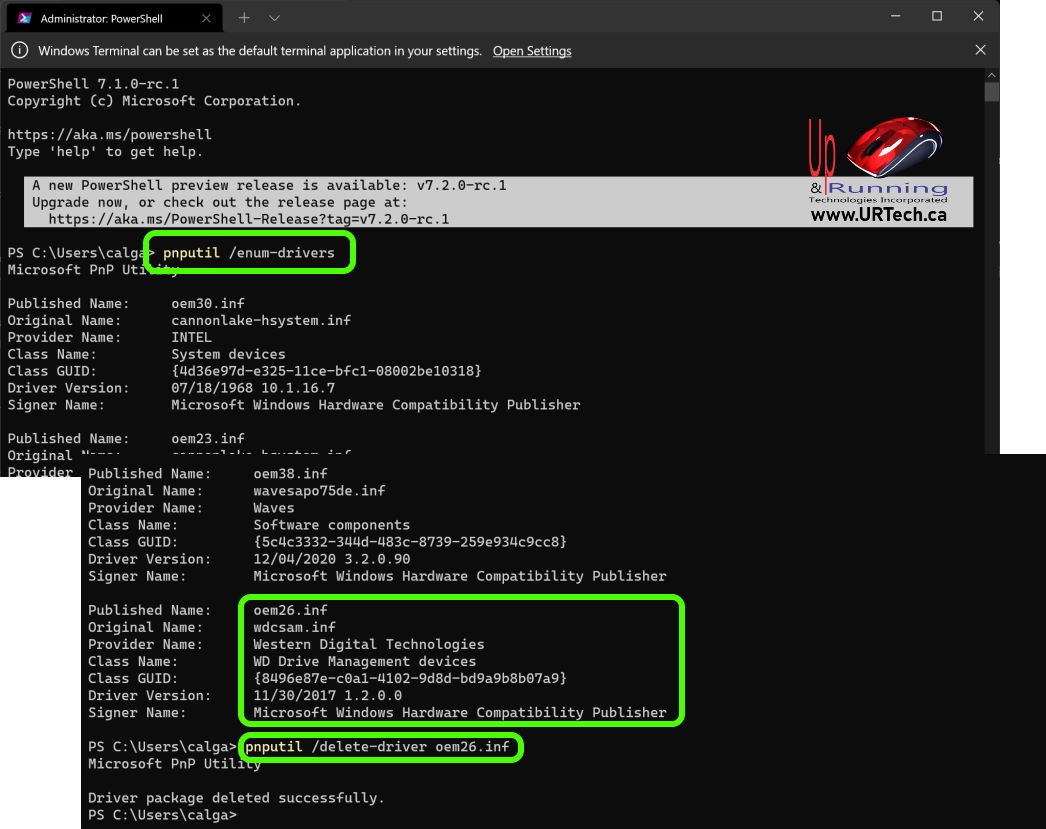
Fortunately, it is very easy to remove:
You do NOT need a reboot so you can immediately retry to enable CORE ISOLATION and you should see a prompt to reboot once Core Isolation > Memory Integrity is turned ON.
This website uses cookies.
View Comments
ERROR: "Failed to delete driver package: One of more devices are presently installed using the specified INF." Not very helpful error message.
Failed to delete driver package: One or more devices are presently installed using the specified INF
Thnx! It's realy help to me
I actually have Western Digital hardware actively using the oem30.inf that is preventing me from turning on memory integrity.
The offending hardware is the 3TB WD drive I use for older games that don't benefit from using SSD drives.
C: 1TB SSD (System)
D: 1TB SSD (Games)
E: 3TB HD (Games)
The drivers are up to date, so I am left with the annoying security notification in my systray.
Seems a real shame to outlay cash to replace a piece of perfectly serviceable tech...
Me too. But I fixed it. Go to your Device Manager window. In title bar, click on View and select View by driver. Find oem30.inf and right click on it. Then check off Remove and Force remove. It worked for me on Windows 11. Now I am able to turn on Memory Integrity etc.
This was simple and it worked! No need to bust into the powershell and all that. Just follow M McBride's simple and direct solution! It works! Thank you!
This worked, great thanks
No need to use pnputil /enum-drivers to identify the oemNN.inf. There is a dropdown next to the offending driver name and it tells you the .inf name that needs addressing.
Thanks for the tip
This works great. You need to lookup to see what driver it's for, mine was a USB Wireless Internet Antenna and wasn't needed anyway so I deleted it and it fixed my issues. However if you still have issues, I recommend going directly into Advanced Startup and boot into BIOS to check your CMOS and Safe Boot as well as Virtualization On/Off settings as well as Hypervisor in Services or Hyper-V. If you have Windows 10/11 and don't sideload Linux, which there's no reason to anymore for developers who can just run a container/Docker solution/VMs and of course WSL.exe - WSL v2 - Ubuntu (or whatever installed linux flavor you prefer to run linux very well on Windows Subsystems or WSL.
This was good advice. It worked on my Asus workstation with WD drives in RAID5. Have been working through several computers with different configurations to complete Win 11 upgrade and enable VBS.
Hi Guys,
This is a good workaround, But is there a new driver to fix this issue?
Failed to delete driver package: One or more devices are presently installed using the specified INF.
/force after the intial command
mee too give me the same msg