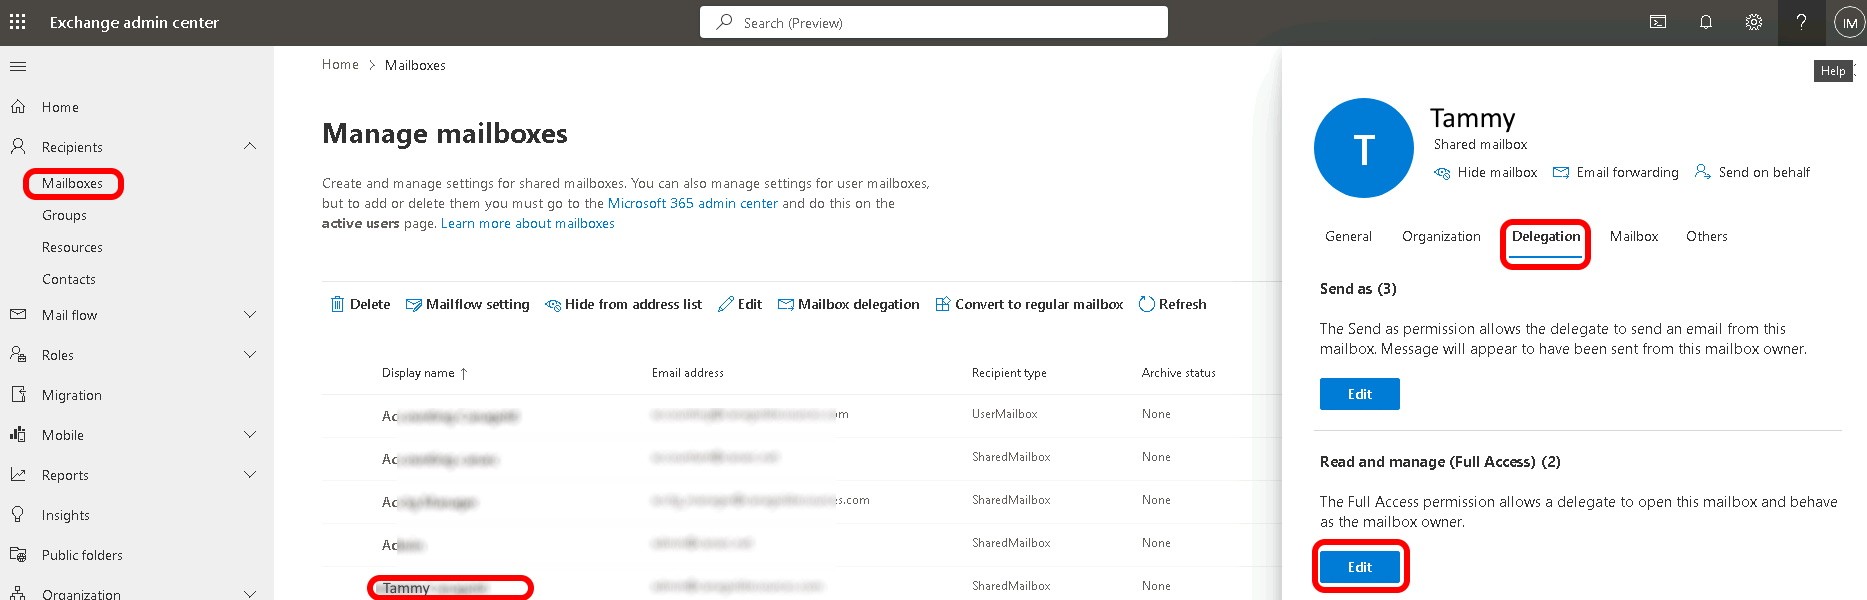
To delegate a user rights to shared mailbox in Exchange it pretty easy:
The problem with adding a delegate through the Exchange portal is the delegated mailbox will “automap” into the users Outlook. If you have a bunch of these delegated shared mailboxes in your Outlook it can get a bit ugly and can certainly slow things down.
Many people just want to be able to surf to the Outlook Web App (OWA) and switch user to see the shared mailbox.
Interestingly, delegating someone to have SEND AS or SEND ON BEHALF OF rights, does NOT cause the shared mailbox to map into their Outlook. Mapping only happens with READ AND MANAGE (FULL ACCESS).
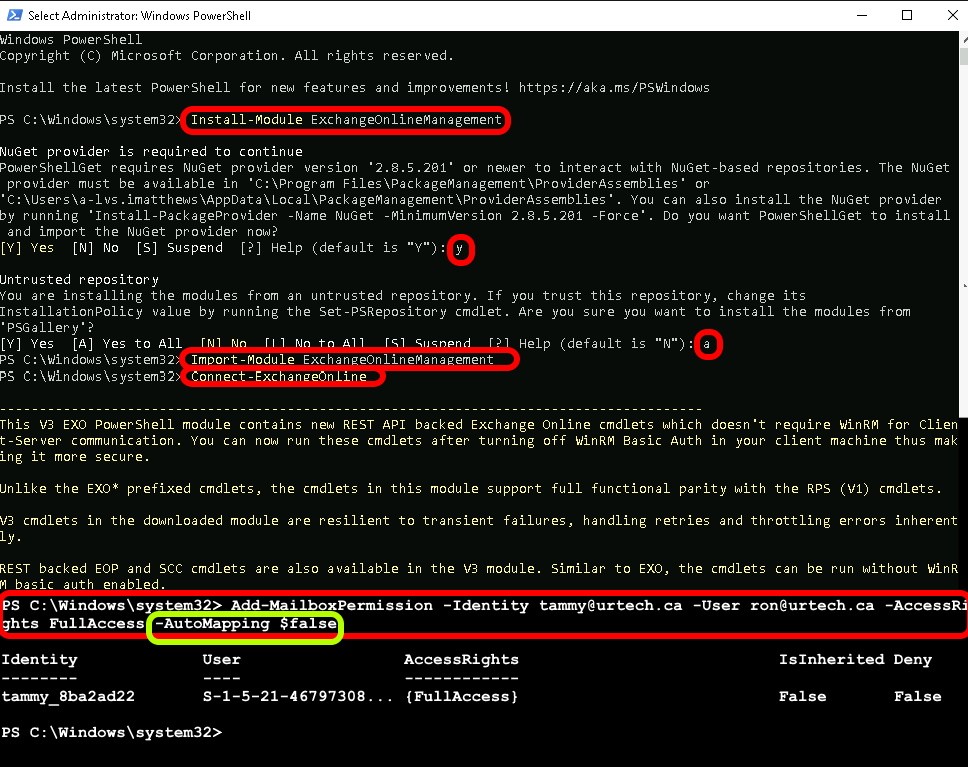
If you want to add someone to a shared mailbox but do not want that mailbox to appear in their Outlook, you have to do it through PowerShell:
Install-Module ExchangeOnlineManagementImport-Module ExchangeOnlineManagementConnect-ExchangeOnline Add-MailboxPermission -Identity [SharedMailBox] -User [UserWhoWantsAccessToSharedMailBox] -AccessRights FullAccess -AutoMapping $false NOTE: If you had previously added a delegate, you need to remove them before adding them again, which you can do with this command:
Remove-MailboxPermission -Identity tammy@urtech.ca -User ron@urtech.ca -AccessRights FullAccess
This website uses cookies.