If you are trying to tighten up your security by adding Virtualization-Based Security (aka VBS) to your Windows 11 you might find this error:
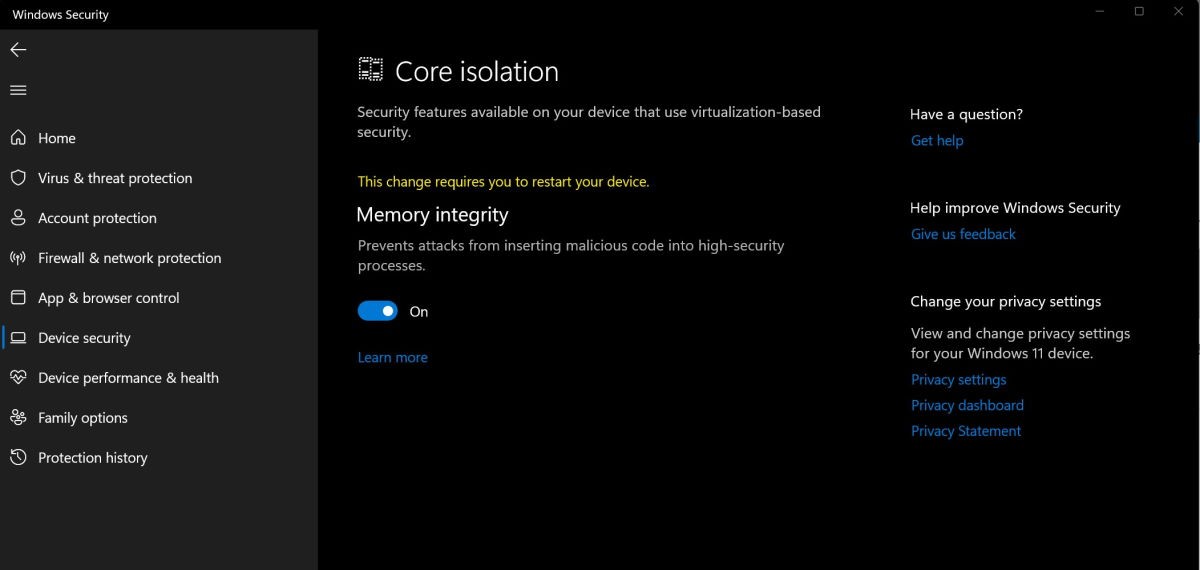
Core Isolation Memory Integrity
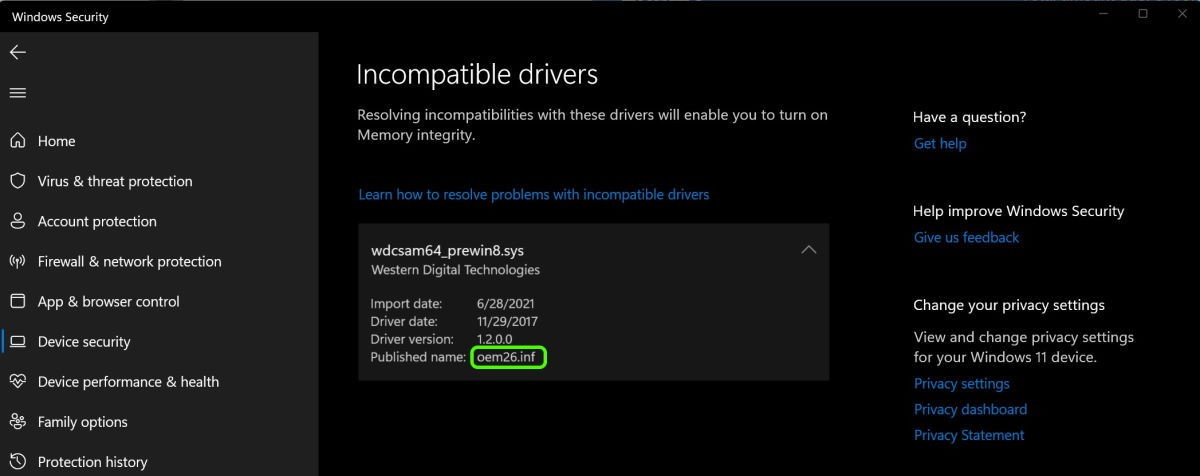
Incompatible Drivers WDCSAM64_PREWIN8.SYS
Driver date: 11/29/2017Driver version: 1.2.0.0Published name: oem26.inf
This is an old driver that ships with both Windows 10 and Windows 11 and very few people need it. In fact we have never run into a situation of any machine using WDCSAM64_PREWIN8.SYS .
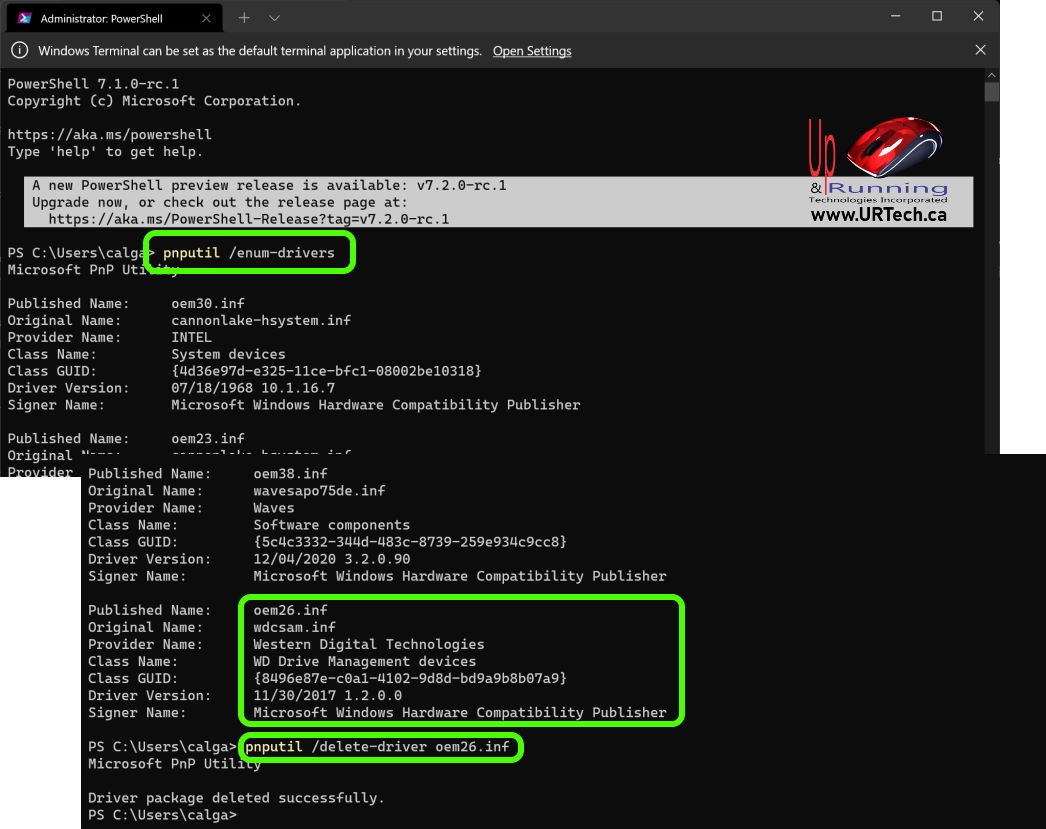
Fortunately, it is very easy to remove:
You do NOT need a reboot so you can immediately retry to enable CORE ISOLATION and you should see a prompt to reboot once Core Isolation > Memory Integrity is turned ON.
This website uses cookies.
View Comments
Thank you. So glad I found this. Much appreciated.
This worked for me. I did login as Administrator and followed the commands as shown in the example. My driver number was oem19.inf which I entered instead of the oem26.inf in the example. Problem solved...thank you!!
Worked, thanks all!
In my case it's says error deleting: "access denied". Can someone help?
I tried all your instructions on PowerShell, even with command /force it says access denied.
Thanks a lot!
How to run as admin?
Run as admin
It worked for me also! Thanks!
I'm trying to delete a problem driver (lvbflt64.sys) on my pc. But the pnputil /enum-drivers command lists only the drivers ending in .inf
Dennis,
The .inf file has information on how the driver is to be installed and will reference the .sys file (DLL). Just search for the base name of the driver (in your case lvbflt64 and you should find it in the list with a .INF suffix. This will be referenced as "Original Name". The OEMnnn.inf file will be shown associated with this and this is the driver to reference in the removal statement. At install time the original .INF file and the .SYS file are copied and windows names the original .INF file with a unique OEMnnn.INF name.
Thanks for the advice; it worked!!
This is helpful
Perfect, thank you so much for this easy solution to an issue Microsoft should handle for its users, rather than leaving them stranded with a cryptic Windows Security error message and no help.
Thanks!