Very few home users think they have more than one network card but almost all do:
- WiFi
- Wired
PRO TIP: In Windows 10 and 11 Microsoft has hard coded the prioritization of a wired network card when a Wi-fi network card exists in the same machine.
In corporate settings, virtually all physical servers have more than one network card and so the question of which card takes priority sometimes comes into play.
Windows does a pretty good job of figuring out where network traffic needs to go But sometimes you may need to manually set the priority so that one NIC takes precedence over the other. We had a situation like that earlier this week when one of our clients had a server with one network card attached to their corporate network And the other attached to their storage network. The monitoring tool that we use is called and it was wrongly wrongly trying to connect to our systems through the storage network card, that’s just not going to work. The solution was to set network card priorities.
How To Set NIC Priority
There are several ways to get into the settings of your network cards, but we will explain the old way which exists on every Windows computer, but you can get to your NIC properties anyway you want.
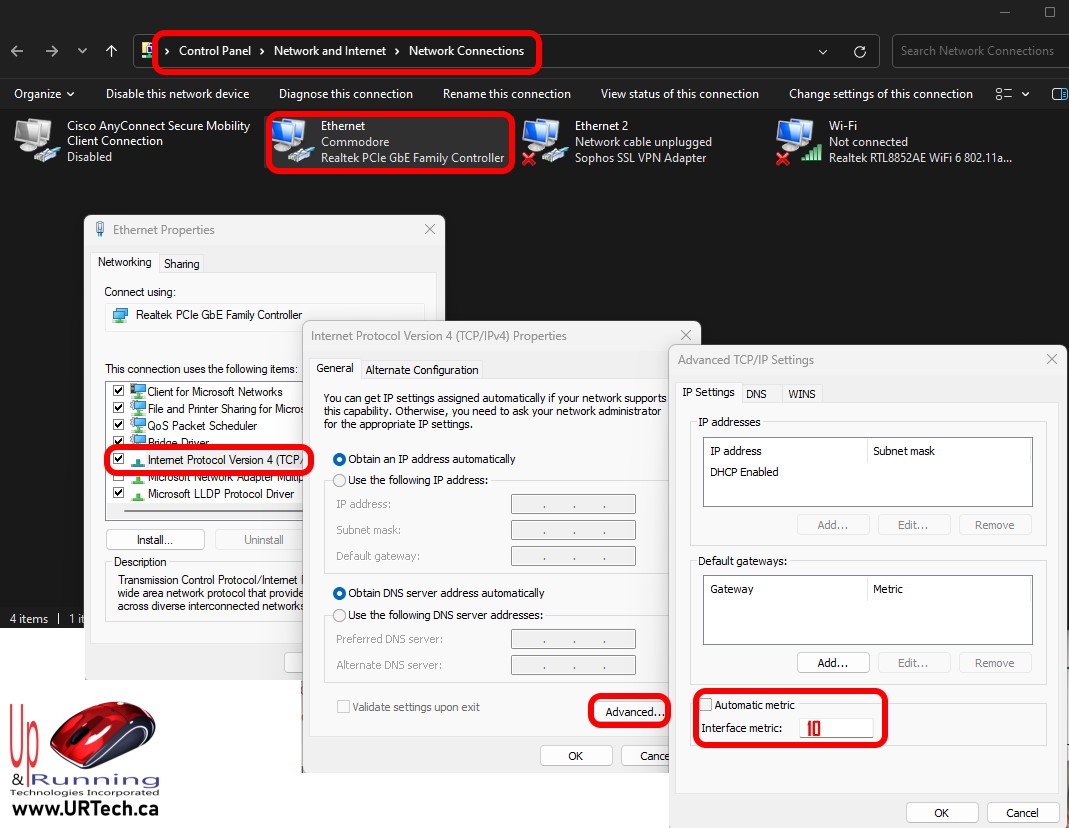
- Go into the Control Panel expand Network and Internet and then click on Network Connections.
- Right click on the first NIC you want to set the priority on and select PROPERTIES
- Double click on INTERNET PROTOCOL VERSION 4
- Click the ADVANCED button
- Uncheck AUTOMATIC METRIC
- Enter any number you want
- We usually use the number 10 for one NIC and 20 for the lower priority NIC, but you can do what you want
- The lower the number the higher the priority i.e. 1 is the highest priority
- Do the same thing on you other NIC
You do not even have to reboot for this to take effect on modern versions of Windows.


0 Comments