NOTE: This article and video demonstrate how to load drivers during a Windows 11 installation but the same process is used for Windows 10 and for Windows Server 2016 2019 and 2022.
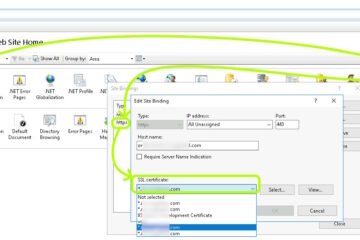
During the Windows installation process on a brand new or bare metal SSD hard drive, there is only one place in which you have a prompt in the graphical interface to install drivers. That place is during the storage / hard disk / SSD controller screen, So we show you how to source and install the Intel RAID controller drivers (Rapid Storage Controller – RST) that are so common on laptops like the Dell Latitude 5440 that we are demonstrating here.
However there is a much more challenging situation that comes up during Windows 11 installations if it cannot find drivers for your network cards either Wi-Fi or wired. In this situation the windows installation just sits on the Lets Connect You To A Network screen. You cannot go backwards you cannot go forwards and you cannot skip it. You’re just stuck if Windows does not have the drivers for your wired or Wi-Fi cards. So in this video we show you how to easily bring up a command prompt and manually install the drivers from a USB stick during the windows installation process.
0:00 Introduction
1:17 How to Install Intel RAID Controller Driver (RST) During Windows Install
6:00 How to install Wired and WiFi Network Drivers During Windows Install
8:45 Outro
How To Install Drivers During A Windows Installation
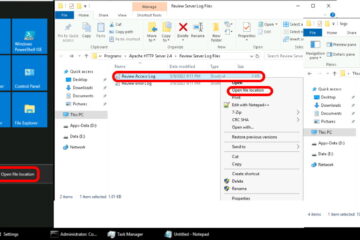
- Download the required drivers to a USB stick
- If the drivers are compressed into a .ZIP, .MSI or .EXE file you will need to extract them
- Locate the .INF and .SYS files then take note of the path to them
- At any point after the first reboot, insert the USB stick into the computer with the Windows installation
- Press Shift+F10 to launch a command prompt during the windows installation process.
- in the case of a laptop press Shift+Fn+F10 To bring up a command prompt
- Type D: and press the ENTER key to change to your USB stick
- CD and DIR your way down to the folder that contains the .INF and .SYS driver files
- Type
pnputil /add-driver *.infand press the ENTER key to install network or other required drivers during the Windows installation process - After the install(s) is complete, press and hold the power button to power off (yes, crash) the computer
- Press the power button again to power up the computer and notice that your drivers have been loaded
- Have a nice day!

0 Comments