Microsoft Azure Privilege Identity Management (aka PIM) is not that hard to setup, but using it can cause some confusion with new administrators.
PIM is a ‘just in time” solution for various levels of admin rights. PIM is often used by companies to ensure that even administrators do not have full access to particular Azure services and systems.
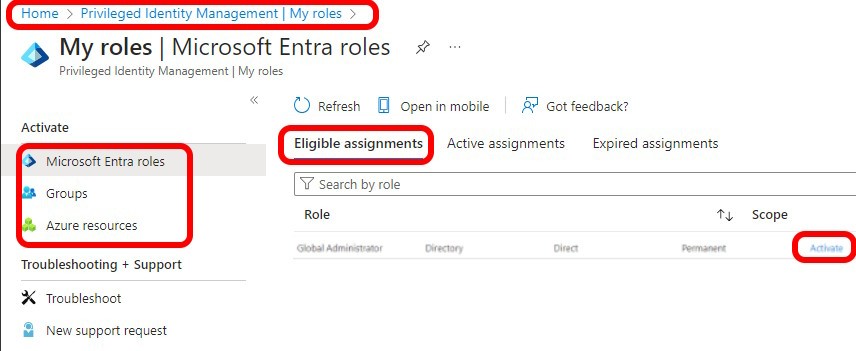
In the example below we show you how to activate a role in Azure Entra, Groups or Resources:
You can get to Azure Entra Privileged Identity Management directly by clicking THIS link or:
- Log into https://portal.azure.com
- Type PIM in the search bar at the top of the page
- Click Privileged Identity Management
- Click MY ROLES
- Click ELIGIBLE ASSIGNMENTS
- Find GLOBAL ADMINISTRATOR (or any other role you want), and click the ACTIVATE link in the ACTION column
- On the right side of the page a slider will open in which you must specify a reason – this is just a text field so any text will technically suffice
- It will default to 8 hours, but you can (and should) reduce that to about double the time you think you will need to accomplish the task (i.e. 1 hour)
- Click the ACTIVATE button at the bottom
WARNING: Do NOT close or move away from the page before it has completed. If you do you move away from the page, you will be prevented from adding that role again until it times out… which could be 8 hours.
If you wish, you can then click on ACTIVE ASSIGNMENTS to confirm the role has been assigned to you successfully.


0 Comments