Screen recording is an incredibly useful tool for creating tutorials, demonstrations, or simply capturing memorable moments on your computer screen. Whether you’re a tech enthusiast, a content creator, or someone who needs to share their screen for work or educational purposes, screen recorder Windows 10 offers built-in screen recording capabilities as well as the option to use third-party software.
In this comprehensive guide, we’ll explore both the native screen recording tools in Windows 10 and popular third-party applications, providing you with step-by-step instructions to help you capture your screen effortlessly. Let’s take a look at how to record video on windows 10.
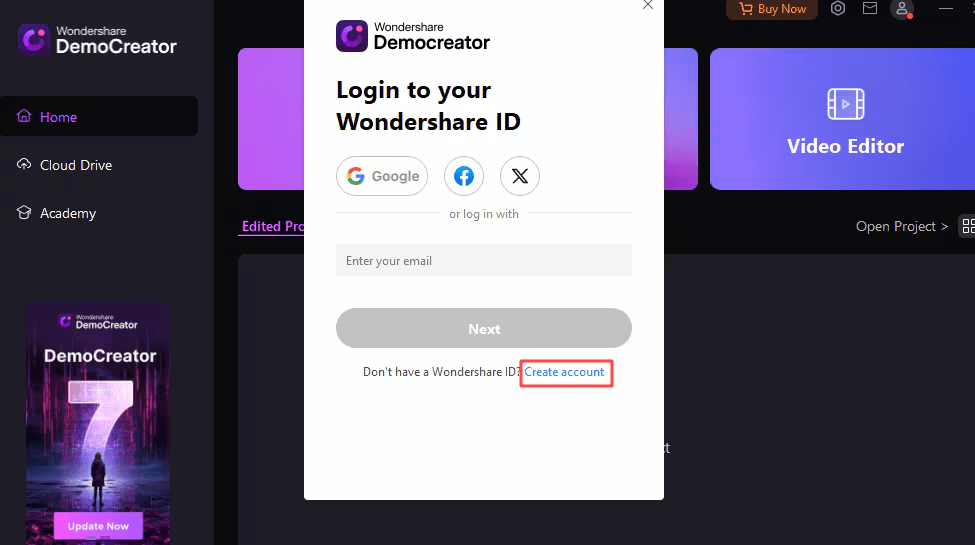
Recommended Product: Wondershare DemoCreator
Wondershare DemoCreator is a powerful screen recording software Windows 10 that empowers users to create professional-quality videos with ease. With its user-friendly interface and advanced features, DemoCreator caters to a wide range of recording needs, from simple screen captures to complex multi-track recordings.
One of its standout features is the availability of six distinct recording modes, each tailored to specific use cases, ensuring a seamless and efficient screen record with Windows 10 experience.
Features
- Six Recording Modes: DemoCreator offers Screen Recorder, Screen & Camera, Camera Recorder, Game Recorder, Avatar Recorder, and Video Presentation modes, catering to various recording scenarios.
- High-Quality Recording: Capture footage in up to 4K/8K resolution at 120 frames per second, ensuring crystal-clear visuals and smooth playback.
- Versatile Capture Options: Record screen, webcam, audio tracks separately or combined, with additional features like cross-screen recording, portrait masking, and matting.
- Comprehensive Editing Suite: DemoCreator includes a powerful video editing suite with AI-powered tools, allowing users to enhance their recordings with effects, transitions, and annotations.
- User-Friendly Interface: The software boasts an intuitive and modern interface, making it accessible to users of all skill levels, from beginners to professionals.
Steps to Record Screen in Windows 10
Here are the steps to record screen for Windows 10 using Wondershare DemoCreator:
1 – Download and Install: Visit the official Wondershare website and download DemoCreator. Follow the installation wizard to set up the rec screen Windows 10 software on your Windows 10 computer.
2 – Launch and Select Recording Mode: Open DemoCreator and navigate to the “Recorder” panel. Here, you’ll find six distinct recording modes to choose from. For screen recording, select the “Screen Recorder” mode, which allows you to capture your screen, system audio, and microphone input simultaneously.

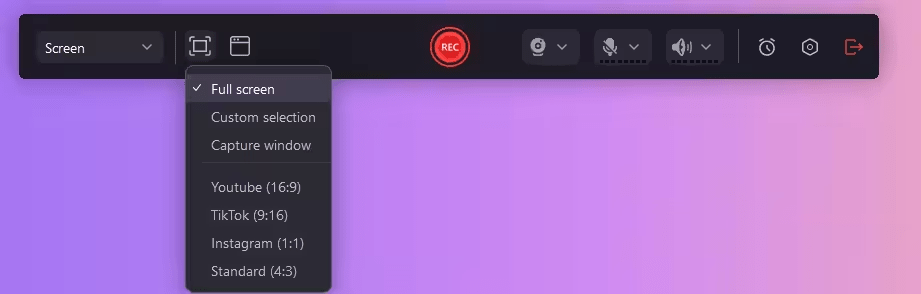
3 – Customize Recording Area: DemoCreator offers flexibility in determining the recording area. You can choose to capture the full screen, select a custom region, record a specific window, or even adjust the dimensions to match various social media platforms.
4 – Start Recording: Once you’ve configured the recording settings to your preferences, click the red “Rec” button or press the F9 key to begin recording your screen. If you need to pause the recording at any time, press F9 again to pause/resume.
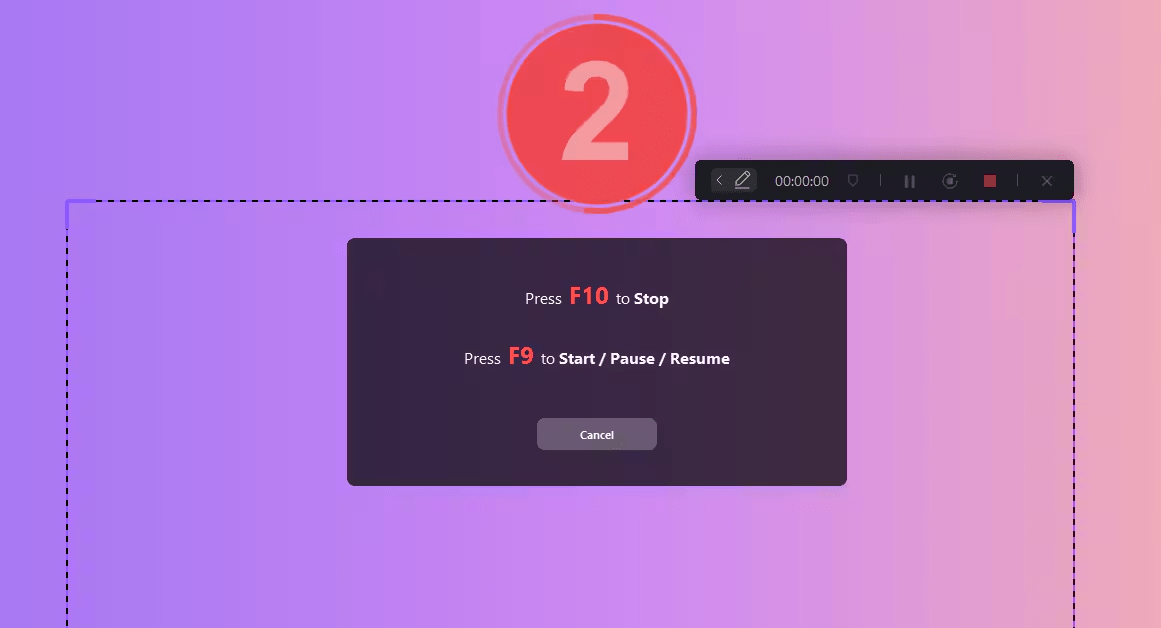
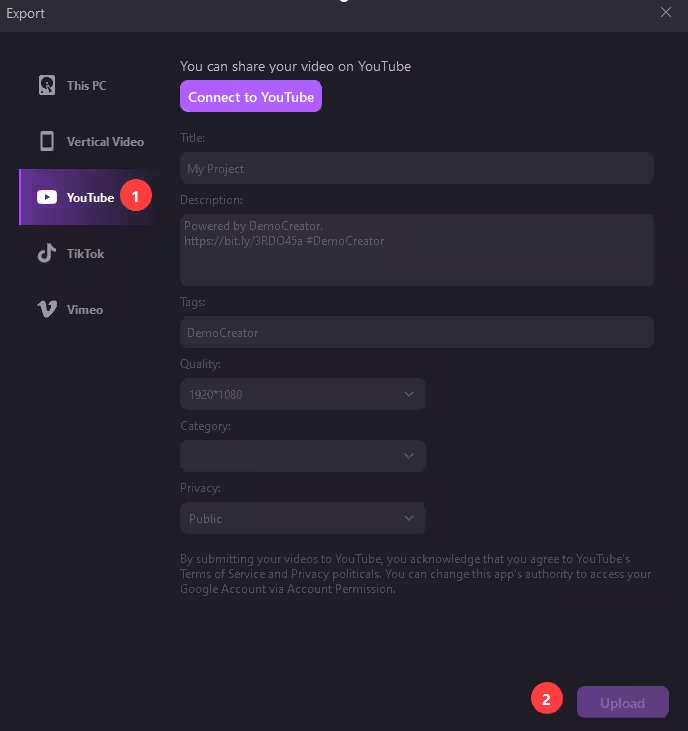
5 – Finish and Export: When you’ve completed your recording, press the F10 key to stop the capture process. To export and save your recorded video, click the “Export” button in the top-right corner of the interface.
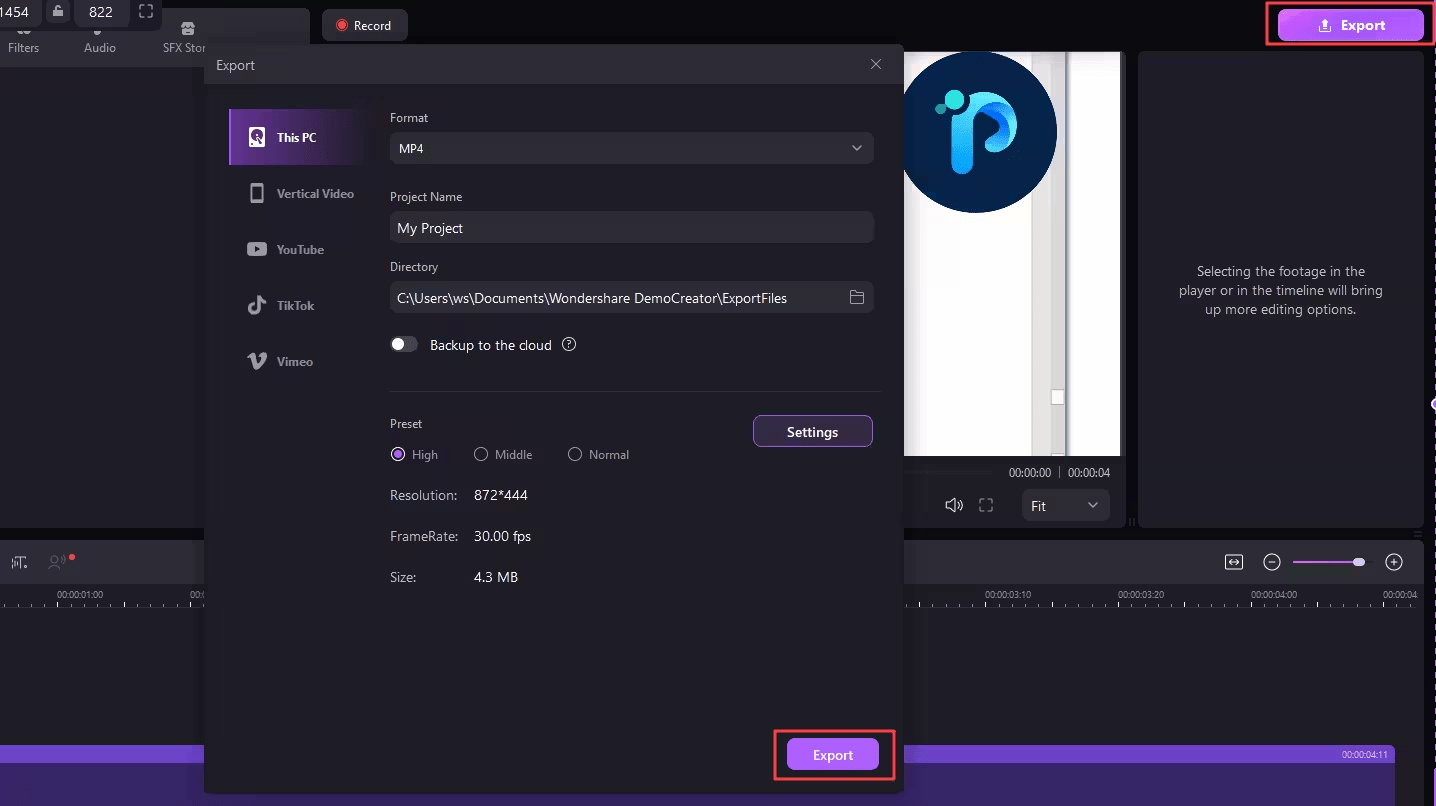
6 – Share to YouTube (Optional): If you wish to share your recorded video directly to YouTube, click the “Export” button and select the “YouTube” option.
Using Built-in Tools: Game Bar
Windows 10 comes with a built-in record screen on Win 10 tool called the Game Bar, which allows you to capture video footage of applications running on your computer. While primarily designed for recording games, it can also be used to record other programs and desktop activities.
While the Game Bar is a convenient built-in tool for basic screen recording needs, it may have limitations in terms of advanced features and customization options.
Here is how to use it for screen recording:
- Launch the application or program you want to record.
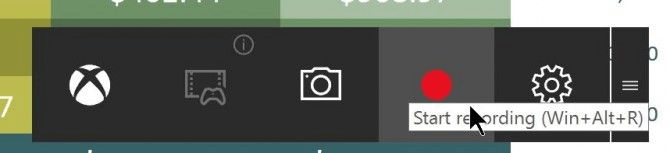
- Press the Windows key + G simultaneously to open the Game Bar dialog.
- Check the “Yes, this is a game” checkbox to enable the Game Bar, even if you’re not recording a game.

- Click on the “Start Recording” button (or use the Win + Alt + R shortcut) to begin capturing the video.
- To stop the recording, click on the red recording bar that appears at the top-right corner of the program window. If the bar disappears, press Win + G again to bring the Game Bar back.

- Your recorded videos, saved as MP4 files, can be found in the “Videos” folder under a subfolder called “Captures.” You can also access them through the Xbox app under the “Game DVR” menu, where you can trim and share your recordings on Xbox Live (if it’s a game recording).
Advanced Tips
Here are some advanced tips to help optimize your screen recording settings:
- Resolution and Frame Rate: Higher resolutions and frame rates will produce better quality videos but also result in larger file sizes. Consider your intended use and adjust the settings accordingly. For most purposes, recording at 1080p resolution and 30fps is sufficient.
- Bitrate: Bitrate determines the amount of data encoded in your video per second. Higher bitrates mean better quality but larger file sizes. For 1080p videos, a bitrate between 8-12 Mbps is generally recommended.
- Audio Settings: Ensure that you configure the audio settings correctly. You may want to record system audio, microphone audio, or both, depending on your needs. Adjust the audio bitrate and sample rate as per your requirements.
- Hardware Acceleration: If your computer supports hardware acceleration for video encoding, enable this feature to offload some of the processing from your CPU to your GPU, resulting in faster encoding times.
- Capture Cursor: Most screen recording software allows you to toggle the visibility of your cursor in the recorded video. Disable this option if you don’t need to show the cursor movements.
Troubleshooting
Here are some solutions to common issues you may encounter while screen recording on Windows 10:
- No Sound in Recordings: Ensure the correct audio source (system audio, microphone, or both) is selected in the recording software settings. Check that your audio device is not muted and the volume is turned up. If the issue persists, try restarting the recording software or your computer.
- Choppy or Laggy Recordings: Close any unnecessary applications and browser tabs to free up system resources. Lower the recording resolution and frame rate to reduce the load on your system. Update your graphics drivers to the latest version. For game recordings, try lowering the in-game graphics settings.
- Game Bar Not Working: Make sure the Game Bar is enabled (Windows key + G, check “Yes, this is a game”). Run the program or game as an administrator. Update your graphics drivers and Windows.
- Can’t Record Full Screen or Specific Applications: Some apps have security measures preventing screen recording. Try running the program in windowed mode or as an administrator. Check if your screen recorder supports capturing full screen or that specific application.
- Low Frame Rate or Skipped Frames: Increase the bitrate settings in your recording software for higher quality video. Disable any hardware acceleration or video effects causing conflicts. Ensure your computer meets the software’s system requirements.
- Recording Stops Unexpectedly: Verify you have enough free disk space for recording. Update your recording software to the latest version for bug fixes and stability. Try recording for shorter durations or split recordings into multiple files.
Conclusion
Screen recording has become an invaluable tool in today’s digital age, enabling you to capture and share your desktop activities with ease. Whether you’re creating tutorials, recording gameplay sessions, or simply preserving memorable moments, the ability to record your screen can be a game-changer.
In this comprehensive guide, we’ve explored both the built-in screen recording capabilities of Windows 10 and the powerful features of third-party software like Wondershare DemoCreator. While the Game Bar in Windows 10 provides a convenient solution for basic screen recording needs, Wondershare DemoCreator takes your recording experience to new heights.


0 Comments