There are many reasons you may want to setup a shared mailbox, but the one we see the most often has to do with licensing. Shared Mailboxes in Microsoft 365 do NOT require a license, although all users that connect to that shared mailbox DO require a license.
Note that a Exchange Online Kiosk License is insufficient to access a Microsoft Office 365 Shared Mailbox; you need a full license.
Also, there are many that will tell you it is not possible to log into a Shared Mailbox directly, but we will show you how to easily get around that.
- Access the Microsoft 365 Exchange Admin Portal
- Surf to portal.office.com, sign in, click the A icon for the ADMIN portal on the left rail
- Click SHOW ALL… (in the left menu) then click EXCHANGE
Alternately you can surf directly to admin.exchange.microsoft.com
- Expand RECIPIENTS
- Click MAILBOXES
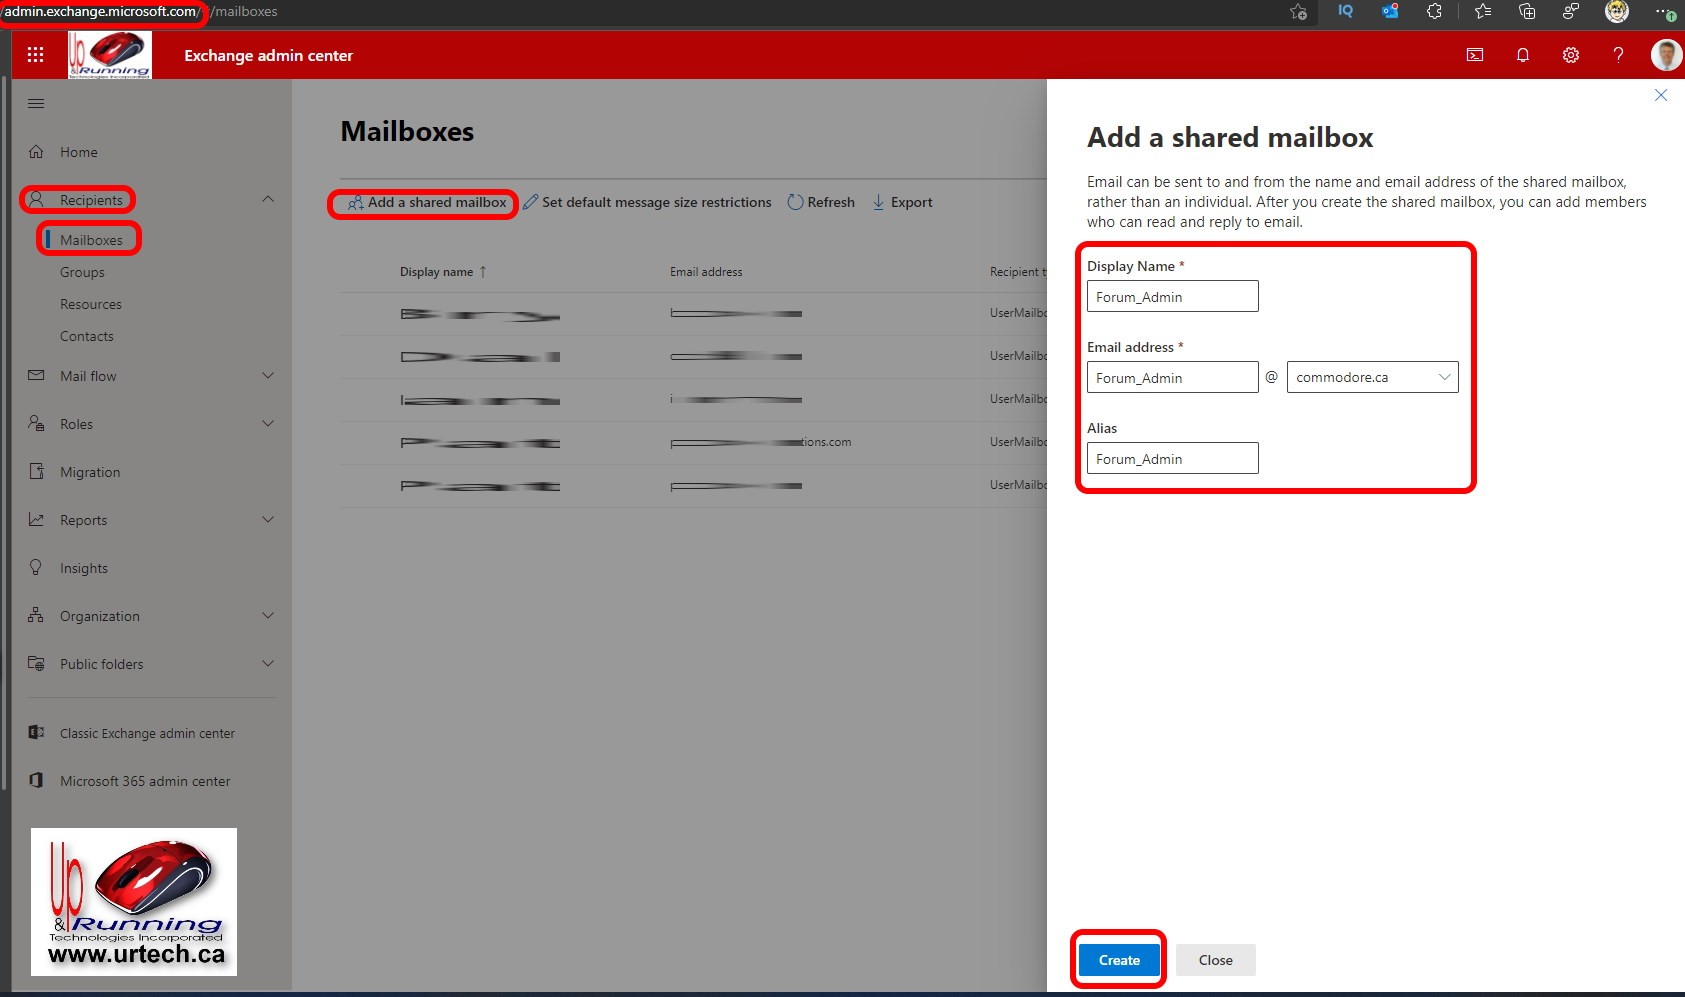
- Click ADD A SHARED MAILBOX
- Enter the DISPLAY NAME, EMAIL ADDRESS and ALIAS you want
- Click the SAVE button
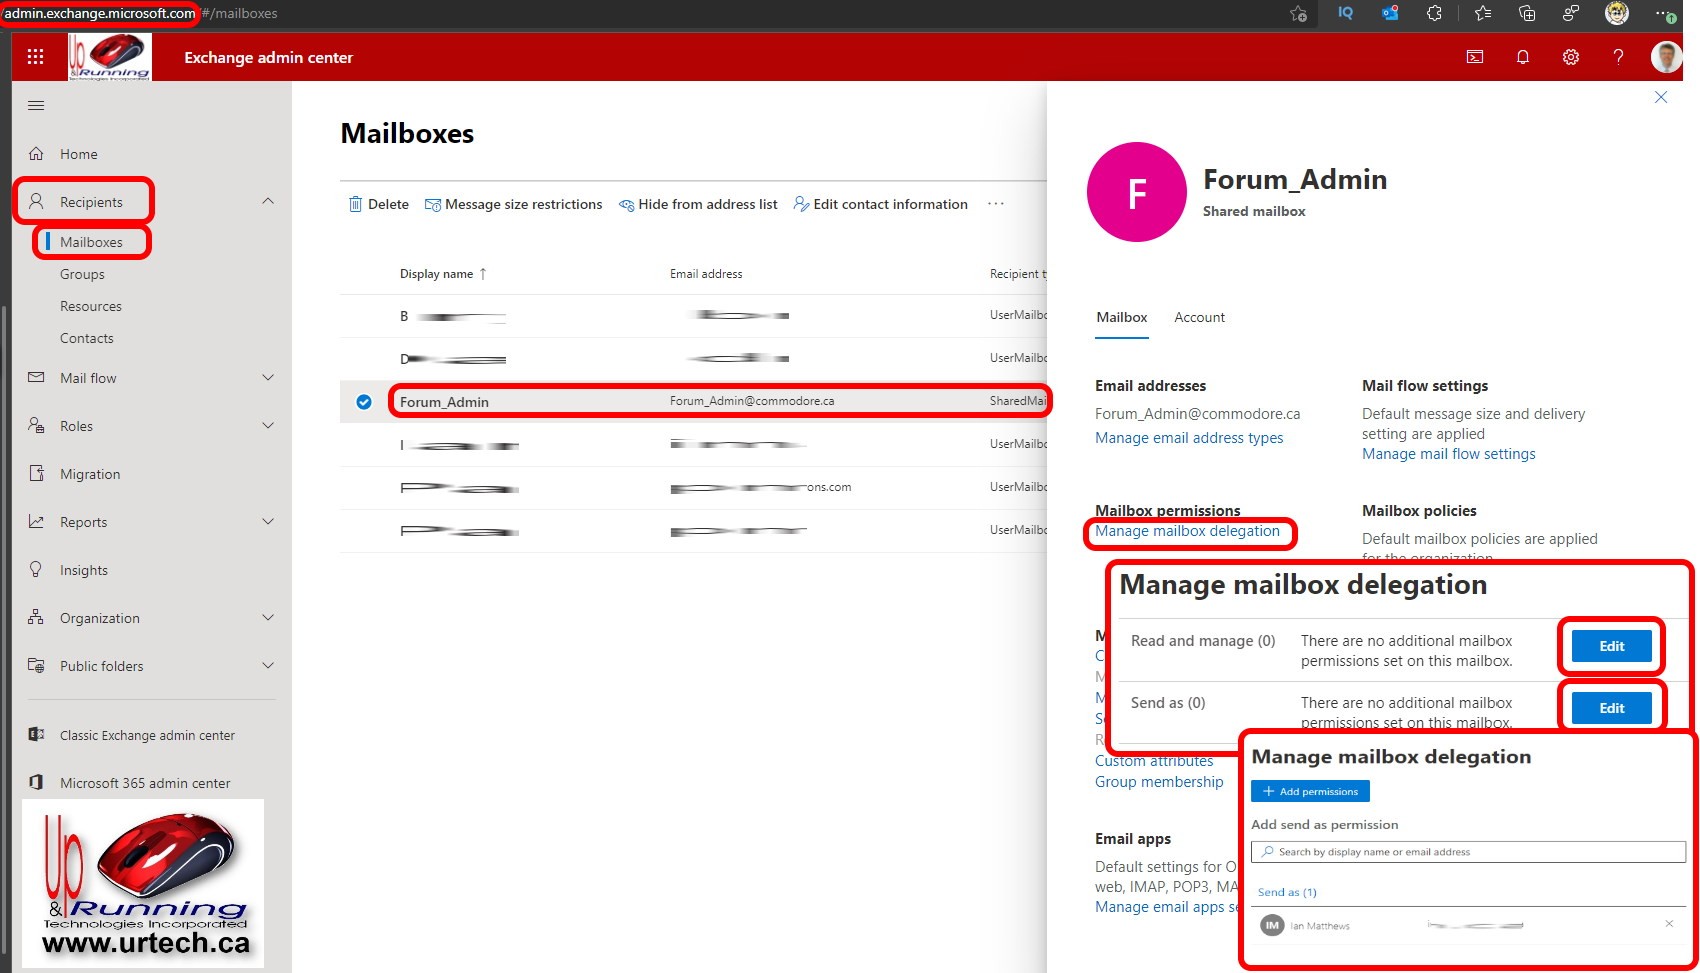
- Click on the Shared Mail box you just created
- Click MANAGE MAILBOX DELEGATION
- Click EDIT on both READ AND MANAGE and SEND AS and add whoever you want to have access to that account
If you want to access a Shared Mailbox directly using Outlook or Outlook Webapp, you need to assign it an Exchange license.
If you want to use a Shared Mailbox as an SMTP relay (i.e. you want a program like phpBB to send email through them) you can’t. See this Microsoft thread on Authenticated SMTP with Shared Mailboxes.

0 Comments